Understanding the Behavior Driven Development and Testing to Ruby on Rails using Capybara libraries can be quite easy as you will see in this blog. Here is a brief explanation of how to test the actual behaviour of the system from an end-user perspective using BDD (Behavior Driven Development) based testing. There are many BDD testing tools for rails, such as the renowned RSpec is considered as a main library and cucumber for writing high-level tests. But here, we are using capybara framework as it is most helpful for this testing.

Capybara is one of the well-known web-based automation frameworks to build functional tests that provide simulation on how the users might interact with your application. Numerous web-based automation tools like Selenium, Watir, Capybara, etc. that are readily available to solve the same purpose. Although they are similar, they are meant to solve the same problem with a slightly different methodology to suit different test types.
The codebase used for testing is in macOS Catalina(10.15.2).
Pre requests
- Install Chrome or Firefox web drivers
- Ruby – 2.6.3
List of gems required
- gem ‘capybara’
- gem ‘poltergeist’
- gem ‘selenium-webdriver’
- gem ‘nokogiri’
How to install Chrome driver in mac
Step1: Get Chrome Driver for Mac
As a first step, download chrome driver for Mac operating system using the link below,
Link: https://sites.google.com/a/chromium.org/chromedriver/downloads
Now, check your downloads folder and unpack chromedriver_mac64.zip file. You will see the chrome driver executable file.
Step2: Move the driver to /usr/local/bin folder
Next step you need to define it as a path in your system. You can check the availability of global path on your system by using the below command,
sudo nano /etc/paths
Now, using the below command you can move the chromedriver file to the /usr/local/bin folder.
mv chromedriver /usr/local/bin
Note: Executing unsigned apps on OS X Catalina
If the app is unsigned, you cannot execute using Catalina in (10.15.2). In that case, you can execute it by making use of the below command,
xattr -r -d com.apple.quarantine chromedriver
Now, all the prerequisites are completed and Selenium tests can be done using chrome driver.
Basic DSL
Capybara has an intuitive DSL which is used to express executable actions. These are the list of commands that are used for testing.
Navigate to any Page,
visit('page_url')
Click any specific link or text,
click_link('id_of_link')
click_link('link_text')
Choose any specific radio buttons,
choose('radio_button')
Checking/unchecking any checkbox,
check('checkbox')
uncheck('checkbox')
Click any specific button by its name,
click_button('button_name')
Fill up any specific field,
fill_in('First Name', :with => 'John')
Select any values in the dropdown,
select('option', :from=>'select_box')
Upload/attach any files,
attach_file('image', 'path_to_image')
JavaScript and Handling Asynchronous Calls
Capybara has an inbuilt internal mechanism to handle asynchronous loading of parts of the page. An ideal example is to click on some part of the page. This will make JavaScript execute and create a new element on the page.
click_link('Dropdown_1')
click_link('Dropdown_2')
For now, let’s assume that a user is filling an address. Here, Dropdown 1 contains the state values and Dropdown 2 contains the values of cities. In this case, dropdown 2 values will be empty initially and it will be auto-populated based on the value selected by the user in dropdown 1. Hence we need to define a waiting time to indicate the system to wait for some time after the click of Dropdown 1. Once the asynchronous process is completed on the link Dropdown 1, it will wait for 2 seconds (default time) and then link Dropdown 2 will be selected. The waiting time can be configured using the below command,
Capybara.default_wait_time
Defining the wait time is a good practice as it helps to avoid the cause of unexpected failures in the script.
Capybara also supports execution of JavaScript using the below command,
page.execute_script()
JavaScript code can be passed like this:
page.execute_script("$('#id button.primary').click()")
Debugging
For debugging the test case, you can take the save and open the HTML in the browser. Use the below command to launch the page in the browser. But, you need “gem ‘launchy’”.
Save_and_open_page
For taking screenshot of success and failure case by using below command
save_screenshot('test.png')
Use also use pry gem for debugging in between test case.
Example
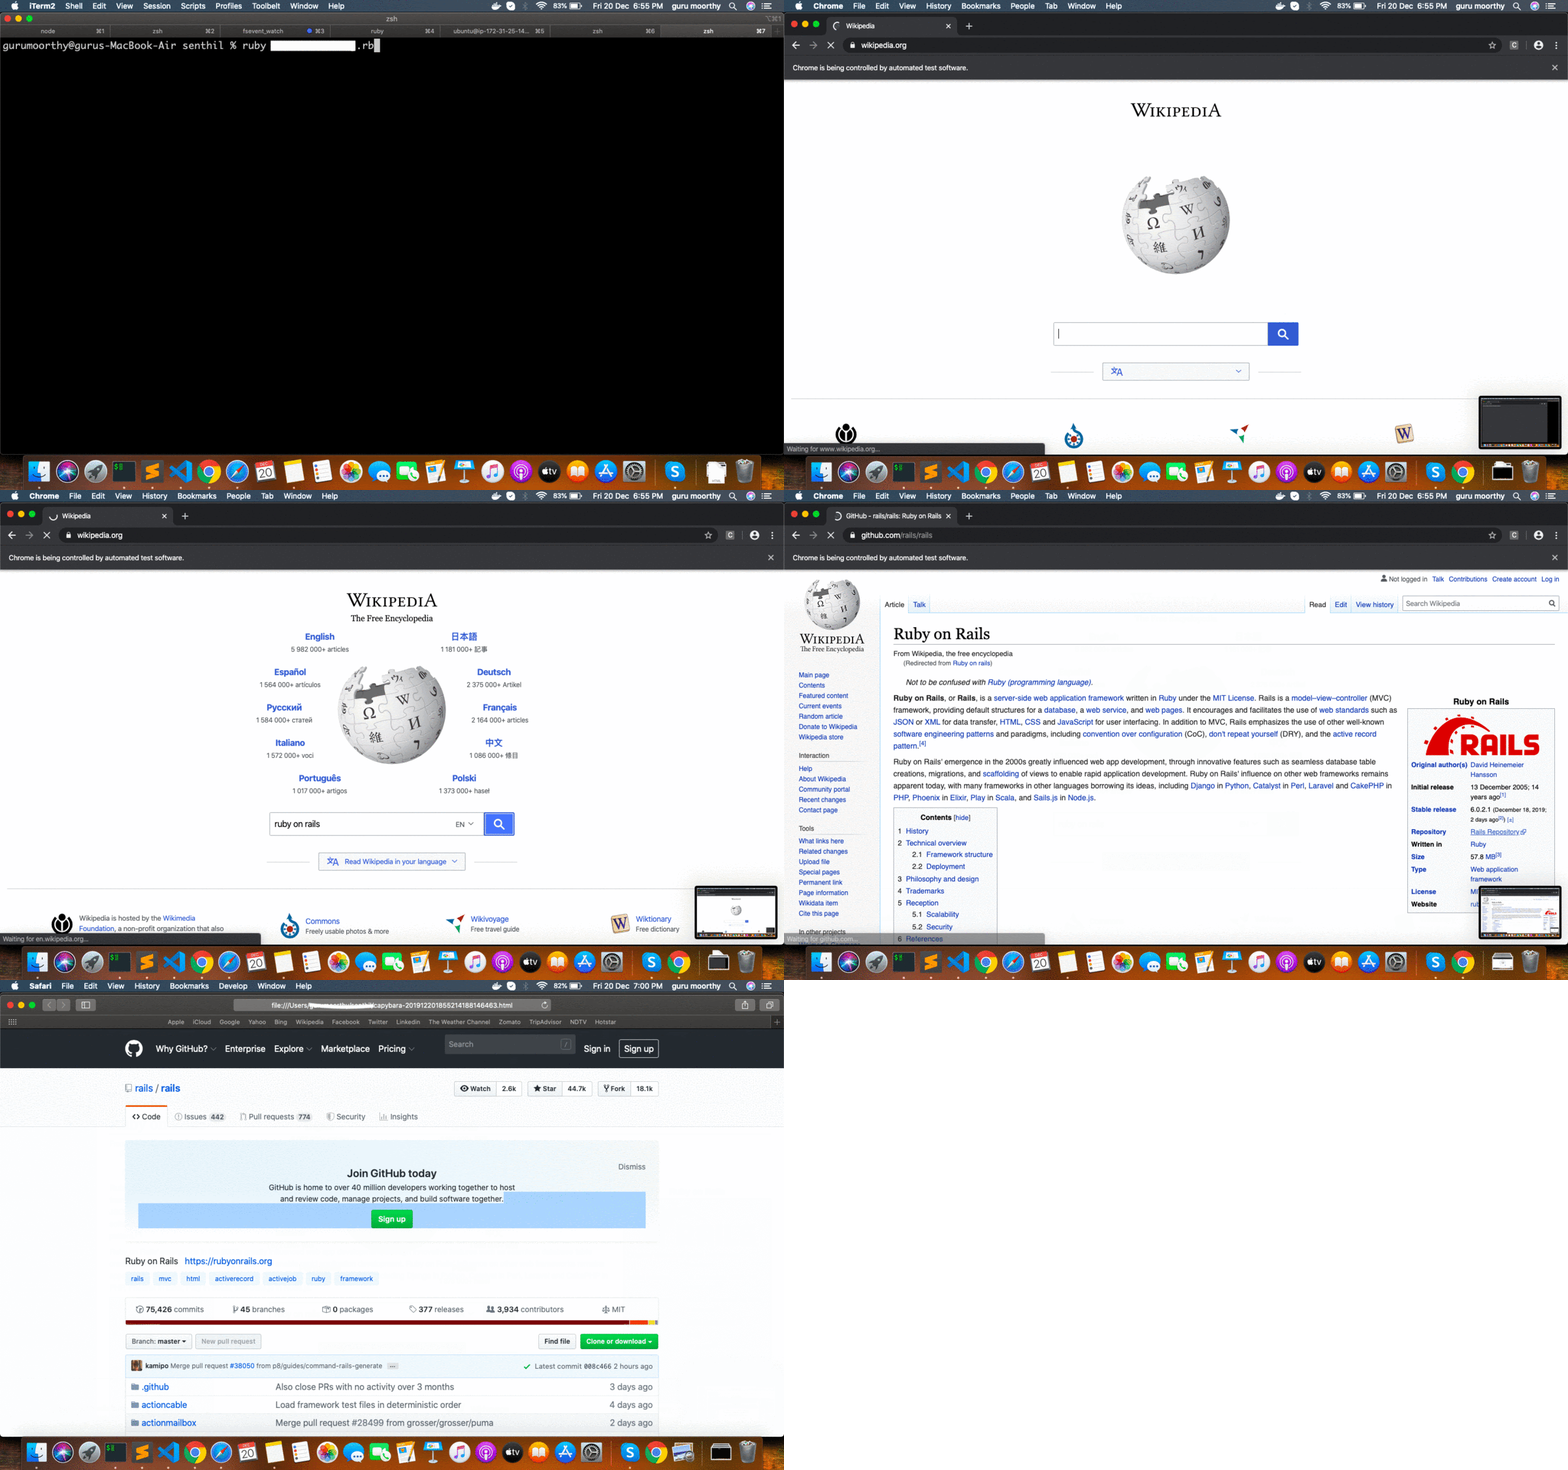
For example, I am going to open the Wikipedia and search “ruby on rails” and then navigate to the GitHub repo page. Then, take a screenshot of both, save the page as HTML and open in the browser.
You just copy the ruby code and create some_file_name.rb file
require 'bundler/inline'
gemfile do
  source 'https://rubygems.org'
  gem 'selenium-webdriver'
  gem 'nokogiri'
  gem 'capybara'
  gem 'launchy'
  gem 'pry'
end
require 'capybara'
Capybara.default_driver = :chrome
  Capybara.register_driver :chrome do |app|
   options = {
   :js_errors => false,
   :timeout => 360,
   :debug => false,
   :inspector => false,
   }
   Capybara::Selenium::Driver.new(app, :browser => :chrome)
  end
def search_in_wiki(browser,homepage)
browser.visit homepage
browser.fill_in 'search', with: 'ruby on rails'
browser.click_button('Search')
browser.click_link('Rails Repository')
browser.save_and_open_page
browser.save_screenshot('screenshot.png')
return browser.current_url
end
browser = Capybara.current_session
driver = browser.driver.browser.manage.window.maximize
homepage = "https://www.wikipedia.org/"
puts "search_in_wiki"
user_url = search_in_wiki(browser,homepage)
Just run the following.
ruby name_of_file.rb

This is everything you should know about the Behavior Driven Development and Testing in Ruby on Rails using Capybara libraries. Also, read more such blogs by subscribing to us.
Get in touch with us to hire the best Ruby on Rails developers in the industry.


