What Is Graphql?
GraphQL is a new open source API standard which is a powerful alternative to REST API that developed by Facebook.
GraphQL is a syntax that exclusively describes how to get data that helps the user to get the exact data they like to extract the sources.
Why Should I choose GraphQL?
In REST API, we need to send overloading data to the front end. For example, if you like to fetch the user data like below,
    “ Get /user  ---> { id: 1,
                                  name: guru,
                                  country: india,
                                  address: ………}”
In the above case, we didn’t require any data addresses but we only need the name & country of the user in REST API.
So we can get it done in 2 ways,
- Making many query parameters
- Creating multiple endpoints
In first method, making more query parameters will be quite hard as it requires us to handle more logics in the back end.
Coming to the next solution, Creating the multiple rest API will eventually slow down the development process of application.
Either way, both can help us to achieve the solution but literally this make us to face the complexities which are unnecessary.
Hopefully, you might have guessed why we’re choosing Graphql here.
Graphql provides a declarative data fetching method to the client side which exclusively helps us to fetch the exact data we need. And, the beautiful part is, you can get done all these processes using a single API from Graphql.
Create A GraphQL Server
First, we need to understand something that the GraphQL is not a complete framework as it needs to be integrated with any backend frameworks like Node.js, Rails to make it work. Also, keep in mind that GraphQL isn’t tied to any specific database or storage engine, instead it will be backed by your existing code and data.
Too many explanations right? Okay, let’s jump straight to the concept!
To create a GraphQL server, here am planning to use ruby on rails, similarly, you can choose any of your favorite languages. But before that, you can also check the list of languages you can implement with GraphQL here https://graphql.org/code/
Let’s Build A Simple TODO App With GraphQL
To build this, am going to use
- Rails 5.2.3
- Ruby 2.6.1
- Postgres database
step1: Create a rails app using below command.
rails new todo-api
Step2: I have included three gems in Gemfile as you can see below,
gem 'pg'
gem 'graphql'
gem 'graphiql-rails'
Step3: Then install the Gem with below code.
bundle install
Step4: Create the folder structure
rails generate graphql:install
Now, you can see the folder created by the graphQL gem
├─ controllers
+ │  └─ graphql_controller.rb
+ ├─ graphql
+ │  ├─ mutations
+ │  ├─ rails_graphql_demo_schema.rb
+ │  └─ types
+ │     ─ base_enum.rb
+ │     ─ base_input_object.rb
+ │     ─ base_interface.rb
+ │     ─ base_object.rb
+ │     ─ base_scalar.rb
+ │     ─ base_union.rb
+ │     ─ book_type.rb
+ │     ─ mutation_type.rb
+ │     ─ query_type.rb
+ │     ─ user_type.rb
This command will also add a new POST endpoint to our routes which gets mapped to app/controllers/graphql_controller.rb so, when you execute this method this will serve as our main API entry point too.
Rails.application.routes.draw do
 if Rails.env.development?
   mount GraphiQL::Rails::Engine, at: "/graphiql", graphql_path: "/graphql"
 end
   post "/graphql", to: "graphql#execute"
 #For details on the DSL available within this file, see http://guides.rubyonrails.org/routing.html
end
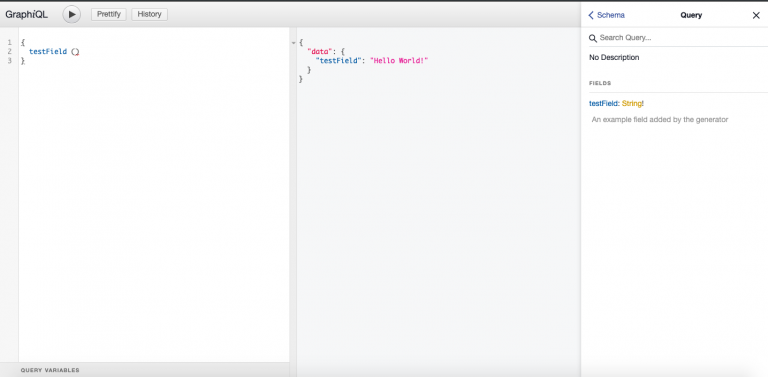
Step6: Open http://localhost:3000/graphiql and you can view the GraphQL server as shown in the below pic,

Step 7: Create a task model and table with the following command,
       rails g model task title:string completed_status:boolean
       rake db:migrate
GraphQl Types
For the Task models, we need to create a series of types. GraphQL knows the type of data it needs to send back when any request of an event occurs. This is closely similar to Rails’ active_model_serializers or JBuilder and these types will set up the structure of our models from the API’s point of view. In our scenario, we’ll specify the columns, model methods, and others to return data to the front-end application. Additionally, more information on declaring types can be found here. http://graphql-ruby.org/getting_started#declare-types
Inside the types folder, create task type there you can create the field which will help to return the data.
In case, if you want to have any association then you can create a separate type and then try to link in the task table so that you can able to query associated table data.
Paste the below code in the mentioned route path then you can modify the value of fields based on your requirement,
# app/graphql/types/task_type.rb
module Types
 class TaskType < Types::BaseObject
   field :id, ID, null: false
   field :title, String, null: false
   field :completed_status, Boolean, null: false
 end
end
All the incoming requests are routed to the two main types,
1) query_type.rb
2) mutation_type.rb.
Those files are already referenced in our schema file and works closely similar like Rails routes & resources.
# app/graphql/RAILS_APP_NAME_schema.rb
class TodoApiSchema < GraphQL::Schema
 query(Types::QueryType)
 mutation(Types::MutationType)
end
Now you can add the query field and tasks, also the respective method of tasks in the query_type file to get the data.
#/app/graphql/types/query_type.rb
module Types
 class QueryType < Types::BaseObject
   # Add root-level fields here.
   # They will be entry points for queries on your schema.
   # # TODO: remove me
   # field :test_field, String, null: false,
   # description: "An example field added by the generator"
   # def test_field
   # "Hello World!"
   # end
field :tasks, [Types::TaskType], null: false
   def tasks
     Task.all
   end
   field :task, Types::TaskType, null: false do
     argument :id, ID, required: true
   end
   def task(id:)
     Task.find(id)
   end
 end
end
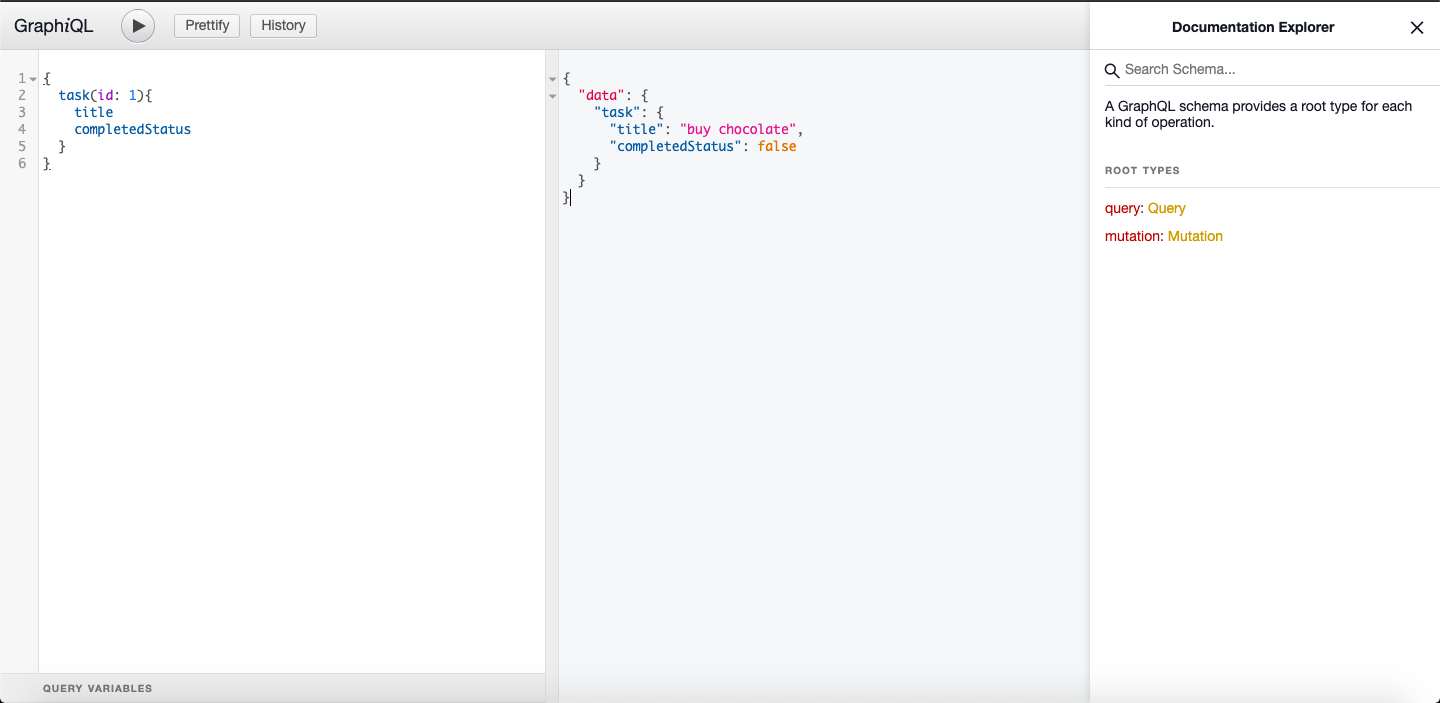
Next, you can add some seed data in DB and visit the http://loaclhost:3000/graphiql there you can also query,
So your screen might look like this,

Implementing mutations In GraphQL
Mutations will help us to create, update, and destroy the data. Also, it will help us to establish the associations between the existing data.
To know more about mutation you can read here https://graphql-ruby.org/mutations/mutation classes
Now create the new folder inside the mutation to extend the class,
# app/graphql/mutations/base_mutation.rb
class Mutations::BaseMutation < GraphQL::Schema::RelayClassicMutation
end
- Arguments – Here we can specify the type of arguments to accept as params that are required. This is closely similar like defining the strong params in the Rails controller but it has enhanced fine-grained control.
- Fields – Similar concept as Query fields listed above. In this case, we accept the arguments to create a user and to return the user field with the new model along with the errors received.
- Resolver – The resolve method is the place to execute ActiveRecord commands. This method returns a hash with keys and these key matches the above-listed field names.
Like these, here you can add arguments which are params that what we need to pass in order to create an action. Similarly, filed are the query which we are going to return after creating the record. Finally, we can able to use the active record method (like new, create, save) in the resolve part.
# app/graphql/mutations/create_task.rb
class Mutations::CreateTask < Mutations::BaseMutation
 argument :title, String, required: true
 argument :completed_status, Boolean, required: true

 field :task, Types::TaskType, null: false
 field :errors, [String], null: false

 def resolve(title:, completed_status:)
   task = Task.new(title: title, completed_status: completed_status)
   if task.save
     # Successful creation, return the created object with no errors
     {
       task: task,
       errors: [],
     }
   else
     # Failed save, return the errors to the client
     {
       task: nil,
       errors: task.errors.full_messages
     }
   end
 end
end
Then add this new mutation to the main mutation type class and it will be displayed in our GraphQL,
Add the below code in the mentioned path,
#app/graphql/types/mutation_type.rb
module Types
 class MutationType < Types::BaseObject
   # TODO: remove me
   # field :test_field, String, null: false,
   # description: "An example field added by the generator"
   # def test_field
   # "Hello World"
   # end
   field :create_task, mutation: Mutations::CreateTask
 end
end
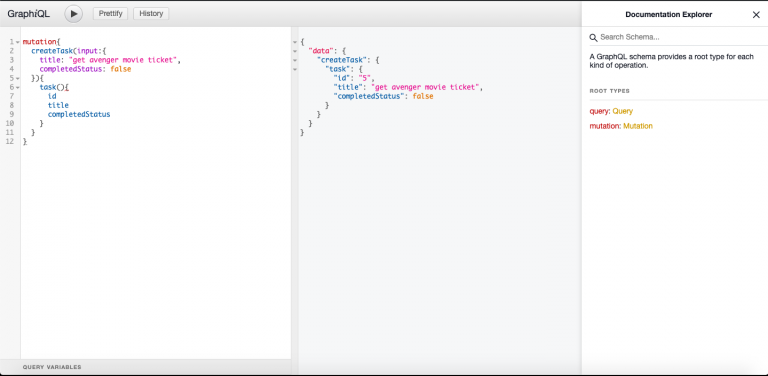
Now you can able to add the data through the mutation in the database as we have shown in the picture

Similarly, update and Delete are also have the same process, you can check my GitHub link for more details https://github.com/guru28/todo_api
Connect React To GraphQL
Create the new react app
    create-react-app graphql-react-todo
    npm start
This will create the empty app to start the development, then we need to install some front end dependencies as mentioned below,
npm add bootstrap@4.1.3 reactstrap@6.4.0 apollo-boost@0.1.16 react-apollo@2.1.11, apollo-client, graphql@14.2.1,graphql-relay@0.6.0,
Then create the new file apollo.js, and add the base URL of graphQL API
import ApolloClient from 'apollo-boost';
export default new ApolloClient({
 uri: "http://localhost:3000/graphql",
});
To fetch the data, we are using Apollo’s package for querying. Here the React component must be able to connect with the GraphQL server using the client. Also keep in mind, that our entire app needs to be wrapped in an ApolloProvider component & all these changes are needed to be done in index.js.
#/src/index.js
import React from 'react';
import ReactDOM from 'react-dom';
import './index.css';
import { ApolloProvider } from 'react-apollo';
import 'bootstrap/dist/css/bootstrap.min.css';
import client from './apollo';

import App from './App';
import * as serviceWorker from './serviceWorker';

ReactDOM.render(
<ApolloProvider client={client}>
 <App />
</ApolloProvider>
, document.getElementById('root'));
serviceWorker.unregister();
// If you want your app to work in offline too with faster loading, then you can change it from unregister() to register().
Learn more about service workers: https://bit.ly/CRA-PWA
Create a new file src/TaskViewer.js for fetching the data which will be used to render it in a table :
#src/TaskViewer.js
import React from 'react';
import gql from 'graphql-tag';
import { Query } from 'react-apollo';
import { Table } from 'reactstrap';
export const GET_TASKS= gql`
{
  tasks {
    id
    title
    completedStatus
  }
}
`;
export default () => (
<Query query={GET_TASKS}>
  {({ loading, data }) => !loading && (
    <Table>
      <thead>
        <tr>
          <th>Title</th>
          <th>Status</th>
        </tr>
      </thead>
      <tbody>
        {data.tasks.map(task => (
          <tr key={task.id}>
            <td>{task.title}</td>
            <td>{task.completedStatus === true ? "completed" : "Pending"}</td>
          </tr>
        ))}
      </tbody>
    </Table>
  )}
</Query>
);
Now we should include the TaskViewer component in our src/App.js file
After adding, it must look like this:
import React, { Component } from 'react';
import TaskViewer from './TaskViewer ;
class App extends Component {
 render() {
   return (
     <main>
       <TaskViewer  />
     </main>
   );
 }
}
export default App;
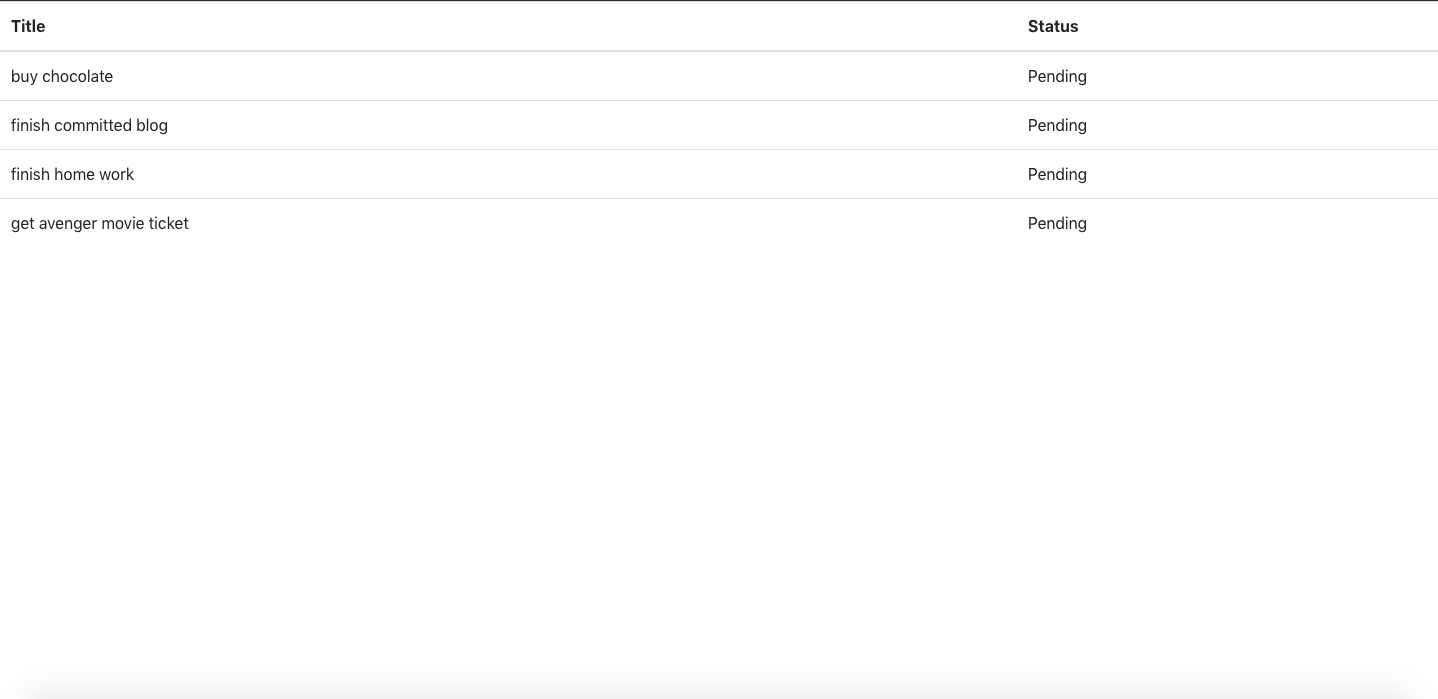
Finally, once you start the npm, it will fetch all task and will list in the index page.

If you need the complete source code you can check my git hub link https://github.com/guru28/graphql-react-todo
[contact-form-7 404 "Not Found"]


